
So you’ve done your homework, read the reviews, and decided to get a Hoppe’s pistol cleaning kit. You’ve got the tools and a filthy pistol in your hands. So, what’s next? Fortunately, all of the difficult labor has already been completed! Although properly using a pistol cleaning kit is a simple process, there are a few pointers that will make your life easier. However, you must exercise caution since improper use of your cleaning equipment has the potential to cause damage to your handgun. Continue reading if you want to learn how to safely clean your firearm.
What Is A Gun Cleaning Kit?
One of the most critical tools a gun owner should have is a pistol cleaning kit. Sure, you’ll need ammo, targets, and holsters, but if your pistol is a shambles, you’ll have a difficult time on the range and, maybe, in the field.
You could put together a cleaning kit from scratch—brushes, rods, patches, and solvents—and it would work fine, but having a pre-assembled kit is much easier and more streamlined. You won’t have to worry about brushes and rods not working together or having the incorrect tools for the job. There are a variety of pistol cleaning kits to select from, and while they’re all good, they’re not all created equal—which isn’t necessarily a bad thing because different kits serve different functions.
When it comes to the best gun cleaning kits, no one does it better than Hoppe’s. For decades now, Hoppe’s has proven they know what a gun owner needs and each and every product released is made with the same superior quality and dedication to craft. Simply put, when you want to take the best care of your guns, you want Hoppe’s.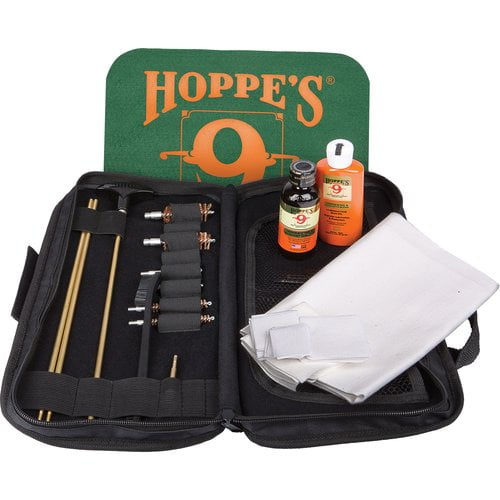
Be Safe!
The first and most critical step in cleaning your firearm is to ensure that it is unloaded. Many mishaps occur during cleaning as a result of people failing to ensure that their pistol was unloaded. Many semi-automatic handguns make this scenario even more problematic, as some of them require you to lower the firing pin in order to release the slide. As a result, it is critical to inspect the chamber and magazine both visually and physically. When cleaning your firearm, you’ll also want to make sure there’s no live ammunition in the vicinity.
Just because you’re cleaning your pistol doesn’t mean you can ignore the fundamentals of gun safety. Throughout the disassembly and reassembly procedure, you’ll want to make sure you never point the gun towards anything you don’t want to destroy. This will ensure that even if a negligent discharge occurs, the bullet will be properly contained and will not do any bodily harm.
Break It Down
It’s time to disassemble your firearm now that you’ve confirmed it’s not loaded. Because disassembly instructions will differ depending on the brand and type of firearm, it’s recommended to watch a YouTube video or reference your owner’s handbook. For gun cleaning, there are two fundamental types of disassembly: field stripping and total disassembly. If you want to learn more about gun cleaning accessories please check our review on best gun vise for AR-15.
Field Stripping
Field stripping refers to the quick and painless disassembly of your rifle, which can nearly always be accomplished with no or few tools. The action is normally separated from the receiver, and the bolt or slide is removed from the rifle. The firing control group is frequently exposed, although it is still intact and placed in the rifle. This gives you simple access to all of your firearm’s primary components for cleaning, and it’s usually all you need to do.
Total Disassembly
It’s a good idea to totally disassemble your rifle every now and again for a thorough cleaning. I like to perform this approximately once a year, primarily before each hunting season for my rifles. A thorough disassembly involves a variety of punches and screwdrivers to remove every single component of your firearm. Only complete disassembly is recommended if you are well familiar with your firearm and are confident in your ability to reassemble it. Otherwise, a gunsmith is the ideal person to do this type of cleaning.
Bust Out The Hoppe’s
After you’ve stripped down your rifle and prepared it for cleaning, the first step is to use Hoppe’s solvent. This will aid in the dissolution of stubborn muck and fouling that would be difficult to remove otherwise. It comes in a convenient spray bottle that allows you to generously spray it down the bore, in the receiver and bolt, and anywhere else where fouling could accumulate. It’s possible that you’ll need to spray some on a patch to get it to run through the bore. To find out which are the best options on the market please check out our review about gun cleaning solvents.
Get Out Your Brush
Once you’ve applied a generous amount of Hoppe’s, you’ll need to use a brush to aid it along. Here’s when your brand-new gun cleaning kit comes in handy. You see all of those wonderful, shining bronze brushes in your brand-new kit, all properly organized? Select the brush that most closely fits your bore size and then thread it through the bore with your constructed cleaning rod.
This is one of the trickier elements of gun cleaning. If you’re not careful, you could damage your weapon. If you’re cleaning your bore using a metal multi-piece cleaning rod, take careful steps to not rub the rod against the interior of the barrel or crown.
The “lips” that connect the cleaning rod parts can easily catch on your barrel and cause damage. As a result, I always use a single-piece carbon fiber cleaning rod or a plastic-coated steel pull cable to clean. If you do decide to utilize the cleaning rod that came with your package, you should install a bore guide to protect your barrel from damage.
There are numerous schools of thought on this, however cleaning your bore from breech to muzzle is typically recommended. This is the same direction in which the bullet travels, and it aids in the removal of all fouling and crud from the muzzle rather than depositing it in the chamber. Running the brush from the muzzle to the breech will just force all of the dissolved fouling into the chamber because the chamber is always slightly larger than the bore.
After you’ve scrubbed the bore thoroughly, proceed on to the receiver, bolt, slide, or any other part of the firearm where you sprayed your solvent. This is where your utility brushes come in helpful the most.

Hi, I am Jerry L. Miculek and I am experienced firearms and optics expert. Guns are not just a hobby for me, they are my passion and life. You can learn more about me on my About page.